NEW! BUY MORE TO SAVE MORE! Purchase 3 to 10+ pcs of the same product and you receive 10% to 30% DISCOUNT.


How to Install Plugins with Crocoblock Wizard

This article is intended to assist you in Jet Plugins set installation by means of WordPress Dashboard. After reading our step-by-step tutorial, you’ll effortlessly install the package.
If you own a Design, Dynamic, or E-Commerce subscription package, you won’t have any options Besides installing the plugins, All-Inclusive plan owners also have an option to install the theme and skins. If you want to install the plugins only, no matter why you decide to install them separately, let’s find out how to perform it with the Crocoblock Wizard plugin.
Upload and Install the Crocoblock Wizard Plugin
The first several steps will be the same as for Full installation. In a few words, you need to download the Crocoblock Wizard plugin and install it on the WordPress Dashboard. *
When you buy Crocoblock Jetplugins Installation With Original Lifetime License Activation from PROPLUGINS.NET this step will be done by our team, for you.
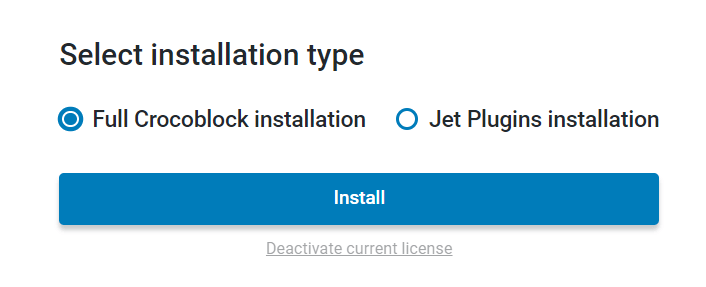
In the Select Installation type window choose the Jet Plugins installation option and click on the “Install” button.
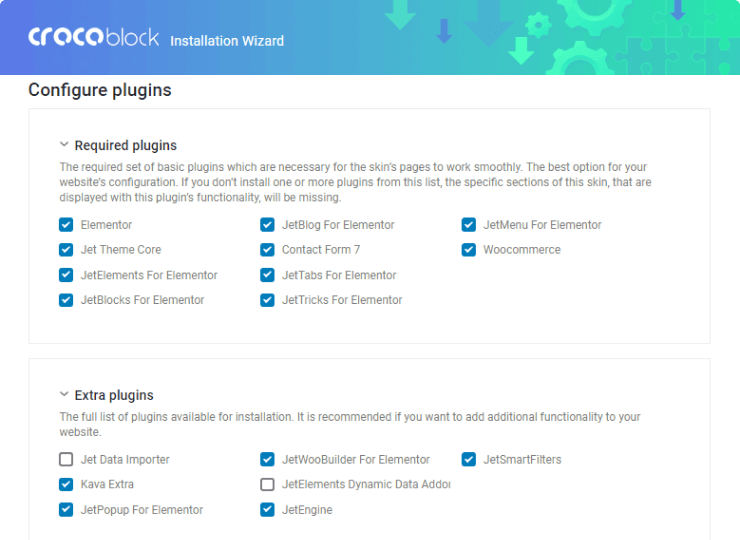
Choose the Plugins
In the Configure plugins screen, you should choose the plugins you want to install. The list of Crocoblock plugins, available for your subscription plan will be presented there and you can choose the most appropriate ones. Afterward, click the “Continue” button.
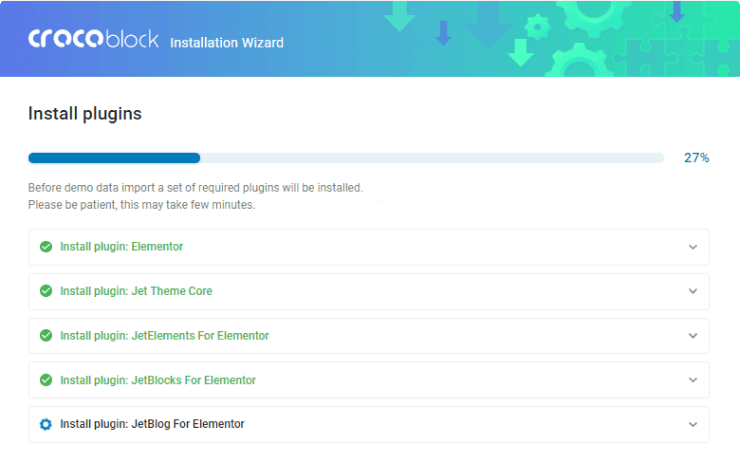
Next, you will see a progress bar of plugins’ installation. It may take a few minutes.
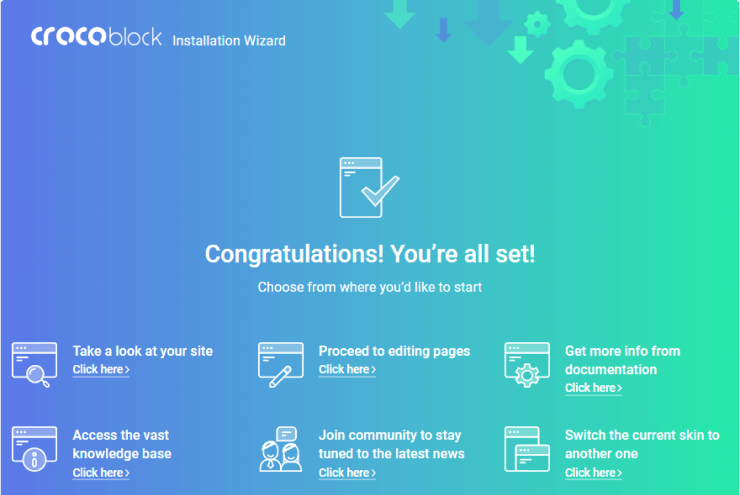
Finally, you will see the Congratulations! You’re all Set! page which provides you with access to your site, documentation and knowledge base, community or to switch to another skin.
Now you are able to use the installed plugins up to your needs to create breathtaking and beneficial websites!
Remember, you can buy Crocoblock Jetplugins Installation With Original Lifetime License Activation HERE
Source: Crocoblock